From Vision to Reality: A DIY VESA Mount for My Gazebo TV
Reusing, rethinking, and 3D printing my way past a VESA roadblock.
William
8/19/20252 min read

When our office began shutting down, a lot of equipment had to go. I ended up inheriting two items that most wouldn’t pair together: a flat screen TV and a desktop monitor arm designed for 75x75 or 100x100 VESA patterns. The TV, of course, uses a 200x200 VESA pattern. At first glance, these two pieces of hardware weren’t meant to work together—but I had a vision.
The monitor arm is designed for desks and clamps onto a surface. My gazebo doesn’t have a desk, but it does have a metal frame with bolts joining the roof supports. By flipping the mount upside down, I found that those bolts lined up perfectly with the clamp holes. Suddenly, I had a new “frame mount” that felt surprisingly solid.
Next challenge: the VESA incompatibility.
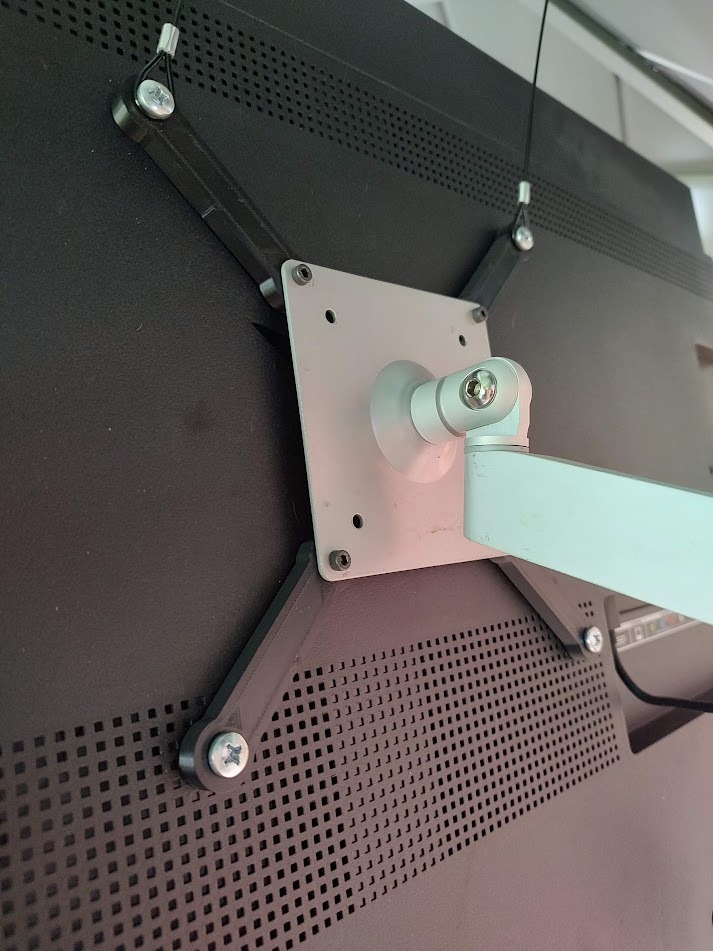
I measured the TV’s 200x200 pattern against the monitor plate and designed an adapter in TinkerCAD. The shape was essentially a dog-bone with holes on each end. One side matched the 100x100 mount, the other matched the TV’s 200x200 holes. To strengthen the connection, I used brass heated inserts—installed with my Pinecil soldering iron—for the first time. On the TV side I used M6 inserts, and on the mount side M4.
I first tested the idea in PETG, but later reprinted the brackets in ASA for extra strength. Printing ASA on my CR-6 SE (unenclosed) can be tricky, but I managed to dial in the temps by raising the bed 10°C above the recommended setting. The result was a clean, strong print.
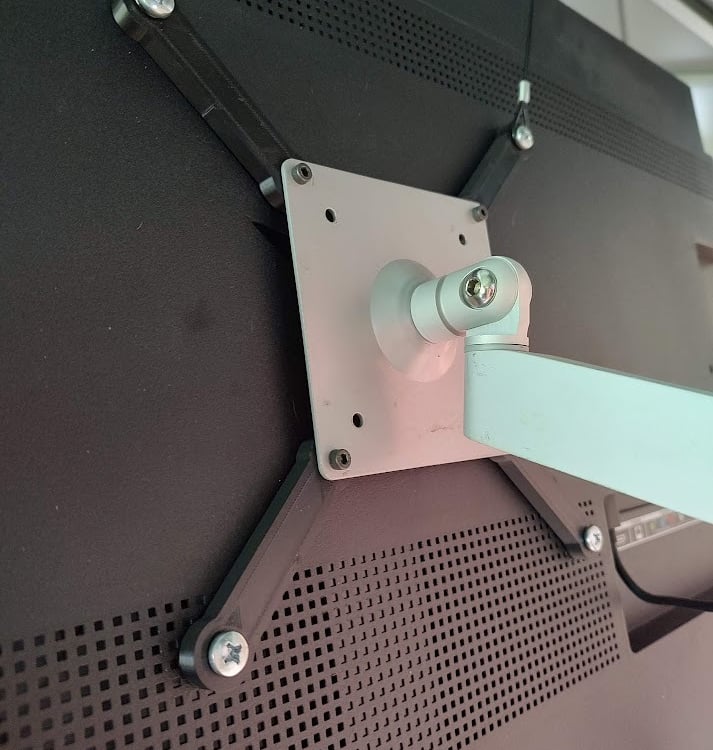
Here’s the finished adapter installed on the TV:
As a precaution, I added two security luggage straps to the top mounting screws, attaching them with steel cables to the gazebo frame. This way, if the adapter arms ever failed, the TV wouldn’t come crashing down—especially important with a hot tub sitting underneath!
The result? A sturdy, upcycled TV mount that transformed spare office gear into something both fun and useful. The 23” test TV worked perfectly, and now the 40” set is ready to go in its new home.
This project reminded me how much satisfaction comes from taking an idea in my head and making it tangible. More importantly, it was a great example of reusing what I already had instead of buying something new. A landfill avoided, a gazebo upgraded, and a little more confidence in what’s possible with a 3D printer, a soldering iron, and some imagination.
Someday I may upload the STL to Thingiverse or Thangs so others can try it themselves. For now, it’s just another reminder of why I love tackling projects like these.